Sunday, January 21, 2024

Taming more chaos while upcycling

Organized clothing drawer


The blog post I wrote earlier this month on sew-your-own choas reducers is now the most popular post I have written. From that, I surmise I am not the only person who wants to tame the chaos in their house. I have more substantial projects that I would like to share, but I will wait on those so that I can share some more tips on reducing chaos with upcycled materials. 

Just before the turn of the new year, I realized that the downstairs drawers that held my sewing materials and the upstairs drawers that held my clothing were complete disasters. I have found that store-bought organizers never work for me in part because they are never the right size. So I organized them using upcycled materials. 

Vertical storage and old socks

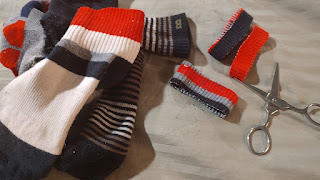
Like many people, I read Marie Kando's The Life-Changing Magic of Tidying Up. While everything in the book sounded great, the only thing I actually implemented was storing clothes vertically.  Doing this allowed me to see everything, but the drawer would revert to chaos when I unfolded one of my many black pieces of clothing to see what it was or when the drawer was less full causing the vertically folded clothes to fall over. A few weeks ago, my son cleaned out his sock drawer and left several holey socks on his floor. He was adamant that I not mend them and they sat around for a few weeks because I could not think of a use for them. Finally, I had a burst of inspiration and decided I would cut the socks into rings and use them to hold my clothes together. 
Socks, scissors and sock rings

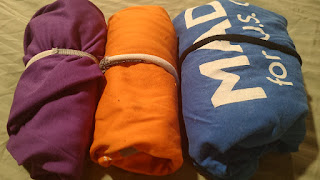
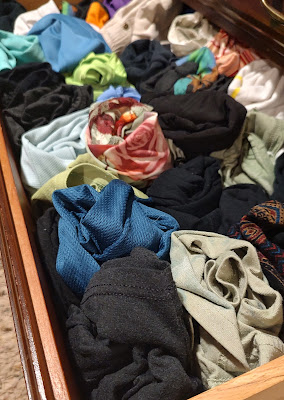
I cut several socks, took each article of clothing out of my drawers, rolled them up and bound them with a sock ring. Then I put the clothing back in the drawer upright. The sock rings didn't constrict the clothing as much as a rubber band and keep the clothes  from becoming unfolded. Now, as pictured at the top,  I can see all the clothing in my drawers and they remain much neater. 

Shirts rolled up and bound by sock rings


Sewing stuff, cardboard and berry containers

My sewing drawers are still a work in process as of today, but I have made several improvements to how I store ribbon, trim and scraps. Before the organizing project, the drawer was full of ziploc bags of ribbon, thread spools that didn't fit into the thread section of my sewing box and scrapsof various sizes. the times were getting all tangled up. 


I put the thread into take-out containers, preventing them from getting tangled up in other items. I folded several of my scraps vertically and placed them in berry containers. I spent the most time on ribbons and trim. I used a shoebox and cut cardboard to fit inside. I wrapped the ribbon and other trims on the cardboard and cut small notches in them so I could keep the ribbons from unraveling. I still have a lot of work to do on the sewing items, but one project at a time.


Monday, January 15, 2024

Sew your own chaos reducers

I find that store-bought organization containers never fit the space I have and just collect junk.  I am, however, a big fan of custom-made items. Over the past few years, I have made several items  I call chaos reducers. They are fabric pockets or baskets in the exact size I need them. I have made chaos reducers for television remotes, jar lids, pencils and plastic container lids.  

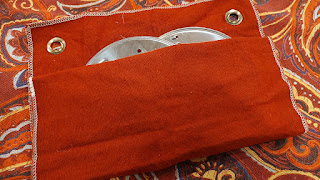
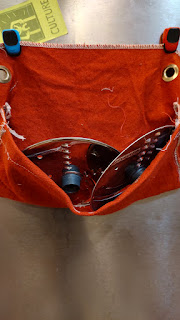
About a week ago I was looking in the cabinet that houses my blender, food processor and other items and I saw, well, chaos.  I have too much fabric and that is also creating chaos. So, I decided to feed two birds with one scone (because who actually wants to kill birds) so I whipped up a quick project to hang the grating and food processor slicing discs. 

I used an upholstery sample approximately 11.5 inches wide and 16.5 inches long with grommets pre-installed. The edges were already serged. For some reason, I really wanted the serged edges to be visible. Plus I didn't have enough width for a gusset construction, so I used construction techniques that might cause someone more expert to look askance. 

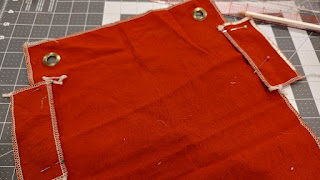
I started the project by laying down the two blades and folding the fabric to roughly fit and marking the fabric.  The pockets needed depth but the fabric was not wide enough so I  cut a strip 2 inches wide from the bottom.  I then cut the strip in half so had two about 2 inches wide and 5.25 inches long. 


Folding fabric to fit discs


Fabric and scissors


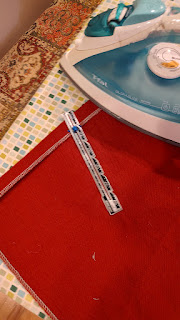
I then serged the raw edges to keep the serge theme going. I folded over the top of the front part of the pocket  (or the bottom of the rectangle) about an inch and hemmed it. I then pinned on the stips flush to where the top of the pocket would be and I stitched about a quarter inch in. 


Pressing hemPinning on sides


Then I folded the bottom of the rectangle up and I stitched on the other side of the stip from the inside. I could not stitch all the way down without catching parts of the pocket I didn't want to catch.  Then I hung it on the fridge to test it.  It gaped like crazy!


Chaos reducer is gaping


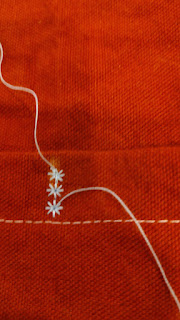
I thought through various options to reduce the gaping like installing a button and button hole. I eventually settled on quick and simple. My sewing machine has some decorative stitches I never had found an opportunity to use. So I tacked down the middle of the pocket with a few snow- flake stitches. 

Snow flake stichesGaping reduced


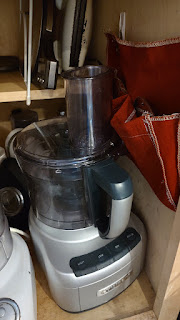
That reduced the gaping quite a bit. I then hung the chaos reducer inside the cabinet using Command hooks and rearranged the items. Now everything fits and is more organized. 

Chaos reducer hanging in cabinet


Here are a few more chaos reducers I have made that hang in the kitchen. 

Chaos reducer for coupons and cards
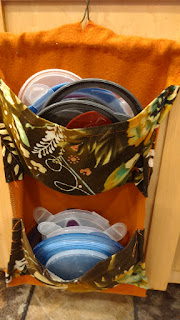
Chaos reducer for lids