Thursday, December 21, 2023

Low waste resolutions


Laundry strips, shampoo/conditioner bars, bag


If you want to make a New Year's resolution to reduce waste, but getting creative with the trash is not your cup of tea, here are a few ideas to generate less waste in 2024 that go beyond refusing straws and bringing your own bags to the store. These are all things my household has incorporated into our routines. 

1. Switch to solid shampoos and conditioners. There are a growing number of high-quality shampoo bars and conditioner bars available. These bars eliminate the large plastic bottles and reduce the need to transport water. I have thick but dry, hair that tangles easily. I use a moisturizing shampoo bar from  J. R. Liggetts and a moisturizing Hi-Bar conditioner.  While not cheap, the Hi-Bar conditioners are less expensive than the creamy conditioner I used to use. I purchase both locally because ordering from Amazon and all the accompanying packaging would defeat the purpose. 

2. Buy in bulk and bring your own containers. My local co-op Mississippi Market and the local zero waste store Tare Market allow customers to bring their own containers for dry goods. I regularly shop the bulk bins at both stores, weigh the containers before filling them, mark the tare weight and buy exactly the quantity I need. 

3. Turn old clothing into rags.  Reduce the need for paper towels by cutting up old clothing and towels into rags. Place them in the wash when you are done. Or if you use it for a heavy-duty job such as oiling a cast iron pan, simply throw it away. 

4. Bring your own containers to restaurants for leftovers. When we eat out, we bring our containers to the restaurants to bring home leftovers.  We also rinse out the thicker zip lock bags that granola or frozen fruit come in. I often tuck a bag that I have rolled up and secured with a twist tie in my purse so that I can use that as a takeout or bulk bag when I don't have a container. 

5. Use laundry strips and wool dryer balls. Like shampoo bars, laundry strips eliminate plastic bottles and water. As an added bonus, they take very little room to store. We use unscented Tru Earth strips.  In the warmer months, we often hang our laundry out to dry. In the colder months, we use wool dryer balls instead of fabric softener. Our dryer balls have lasted a decade. 

And for a bonus, please check out my blog post on normalizing reuse

Sunday, December 17, 2023

Denim ornament upcycle


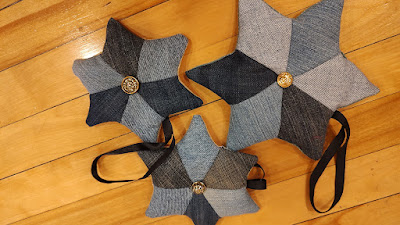
Three denim star ornaments

It's the holiday season. While my Jewish-Muslim family does not do a lot for Christmas, many of our friends celebrate. I had a few events to attend, a few gifts to give and a desire to be sustainable. My stash of scraps and materials to upcycle is also getting too big for the space that I have in my house.  Given all that, I decided to start crafting. 

While I seldom wear jeans because I can't find jeans that fit well (but someday maybe I will make a pair),  I have found that I  like to work with denim especially piecing together different colors. I found the directions to make quilted denim stars from Pillar Box Blue and thought I would make a few as Christmas gifts for a few of my friends who celebrate. 

The directions from Pillar Blox Blue were fantastic, so I won't repeat the step-by-step, but I will share my tweaks. 

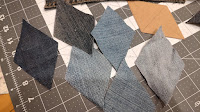
I made the first star using a 7cm template as described in the blog, but that turned out a little large for a Christmas ornament so I created a 6 cm template for the additional ornaments I made. The seams on the first one were a little messier than I wanted so I switched my sewing foot to a quilting foot and that helped me sew more precise about 1/4 inch seams. I also chain-stitched the diamonds for multiple starts didn't have to waste time or thread. 


 Denim diamondsSewing the denim star


I basted the ribbon I wanted to use as the hanger on the edge of the right side of the denim star before I sewed the denim to the backing. That way the ribbon emerged nicely from the seam once I turned the star right side out. I also used small pieces of fabric to stuff the stars. The opening from which I stuffed it was pretty small so I used a funnel and a chopstick to help push the scraps in.  While I did attach a button to the center, the ornaments looked good without additional quilting stitches so I skipped that as well.

I  was pretty amazed at how well the stars turned out. And I was able to wrap the stars with upcycled materials before gifting. 

Upcycled holidays


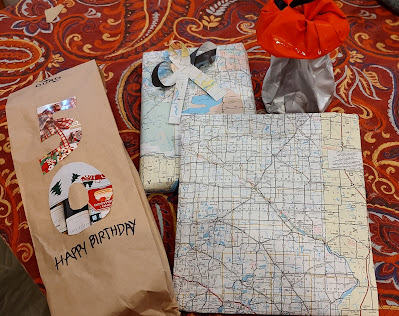
Gifts wrapped with upcyled materials


This year it appears that we have reached 1.5 C of warming above preindustrial levels.  This level of temperature increase is not sustained at this point, but things don't look great for Mothership Earth. I am freaked out. I am also human and therefore a social creature. I have been thinking about recent temperature anomalies and I was invited to two holiday/birthday social gatherings this weekend. It can be hard to reconcile my desire to consume less and participate as a member of society and the consumption that entails. 

These two events involved gifting items to multiple people. So, as I often do, I decided to incorporate zero-waste principles. I did purchase a few new items such as a bottle of wine and books. But then I had fun getting creative with the garbage.  Instead of purchasing gift wrap that would be used once and then tossed or recycled, I chose to reuse other items. I wrapped a few gifts with an old map and even created bows with strips cut from it. 

The bottle of wine came in a bag so I cut a '5' and a '0' from a catalog that came in the mail and pasted them on to create a birthday theme. I also turned a coffee bag inside out to create a gift back for another item. I wasn't so thrilled with how simply turning it inside out looked so I cut the bag into a rectangle and transformed it into wrapping paper.  I cut a few narrow strips from the bag and ran scissors against it to create curly ribbon. 

I also made some upcycled gifts for these events, and you can read more about that in my companion blog post. 

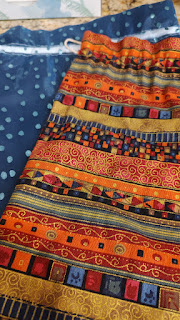
When we exchange gifts within the immediate family, we now use cloth bags that we then save for the next time. We have been using them for the past few years.  


Cloth gift bags


Sunday, December 10, 2023

Upcycling the food scraps

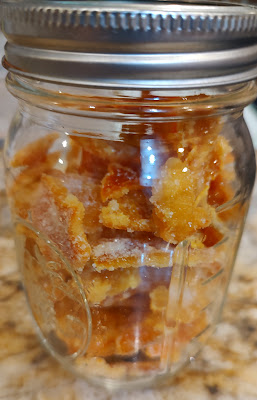
Jar of candided orange peel

Food waste in the United States is a problem. The Department of Agriculture estimates that 30 to 40 percent of the food supply eventually becomes waste.  Sometimes food is left unharvested in a farm field. Other times it spoils in a store or is thrown away by the consumer.  

I feel pretty good about our household composting routine, which involves composting at home in the warmer months and taking food waste to a local drop-off site in the colder months. But food cultivation requires inputs like land, water and energy for transportation. The most sustainable thing is to not waste at all. My family has work to do in this arena and I am striving to waste less food. Often this includes paying attention to what I have, processing things before they spoil, forgoing something tastier for leftovers and substituting ingredients in recipes for what I already have. I also am actively trying to find recipes to use items that would ordinarily go to the compost bin. Two examples are below.  

Orange peels

A panettone recipe I want to make in a few weeks calls for candied orange peels. In preparation, I  considered purchasing orange peels. But since I  cook a lot and know you can make a lot of things people usually buy from the store, I decided to google candied orange peel.  The recipes I found didn't seem difficult. My kid eats a lot of tangeries. I had to persuade him to save the peels, which might have been the hardest part of this project.  I also saved my own. After I had several saved in the refrigerator, I followed a recipe from Epicurious. I blanched the peels for a little less time than called for since I was using tangerines instead of navel oranges. I also halved the amount of syrup. I ended up with delicious candied orange peels that I had to put in the freezer before I ate them all. 

I also ended up with a jar full of orange-flavored sugar syrup, that I didn't know what to do with.  My kid asked what the jar of pee-colored water in the fridge was so I wasn't going to get him to drink a soda with the syrup.  A week or later I was making a limpa recipe that called for both honey and orange peel and I realized I could substitute the orange syrup for those two ingredients. Later,  I  substituted the orange sugar syrup for sugar in a pancake recipe so the jar is nearly gone.

Sushi ginger 

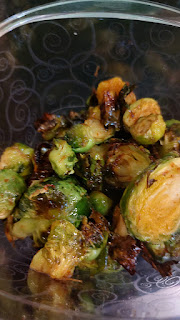
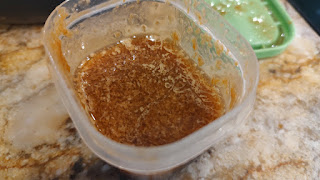
My family occasionally purchases grocery store sushi and does not eat all the pickled ginger (let's not talk about the non-recyclable plastic that it comes in). My spouse put unconsumed ginger in a couple containers in the fridge with no plans on what to do with it. The fridge was getting crowded and I thought "I need to do something with this ginger." So Google came to the rescue again. I found a recipe for salad dressing using pickled ginger.  I followed it loosely, not measuring. I blended toasted sesame oil, soy sauce, the pickled ginger and mirin and ended up with a lovely dressing that I used on roasted brussel sprouts. My son would not eat the sprouts but he did ask for some of the leftover dressing to use on other things. 

Roasted brussel spouts Dressing with pickled ginger


Tuesday, November 21, 2023

The easiest upcycle


Yes, I recently brought the used soap bars home from a recent hotel stay. I carried them in a bag which once held frozen fruit frozen fruit. About a year ago, I persuaded my spouse to switch from body wash to soap to eliminate plastics. Then a few weeks ago, while cleaning the bathroom, I discovered the container where he had put several soap remnants.

I used these remnants to do the easiest upcycle ever. I cut the soap up into small pieces using a knife. 


I put the scraps in a glass measuring cup and added a tablespoon or two of water. I had about a cup of soap pieces. I microwaved it at 60 percent power in 30 second increments until it was melty. You do have to watch it carefully- I did have some overflow. I poured the melty soap into the cups of a muffin tin and let it harden overnight.

Apparently, this process is called milling. So if your family wonders why you have soap bars that resemble peach yogurt, you can reply that these are fancy milled soap bars.


Sunday, October 29, 2023

A trio of towel mends


Three mended towels
 
Over the past week, I mended three towels. Two towels still had a lot of fluff. The other was simply beloved by my spouse, even though I would have cut it up to turn it into rags. Each towel was worn or ripped in a different way so I employed different mending techniques. 

Adding a strip

The brown and white towel had a simple rip along the non terry cloth strip. I don't know if the strip has a name. I reinforced the torn area with some zig zag stitches and then cut a strip of velour from my stash, covered the strip and used a zig zag to stitch around the perimeter.

Blues Clues mend

The first blue towel has two serious tears on it. I pinned a thin scrap over the holes and then I went back and forth over the area using the darning foot to close them up. Then I cut out patches of blue velour and sewed them on each side the towel using a zig zag stitch around the perimeter. I used an over cast stitch on the edges to finish it off. The final product reminded me of Blues Clues.

Binding

The third towel had fraying edges. In the past I had stitched fraying edges with a zig zag, but the towels looked messy. I decided to bind this one. I used washed and preshrunk quilting fabric from my stash. I decided I didn't need bias binding because the towel didn't have curves, the fabric remnant selected was narrow and I didn't want to do the extra work to make bias tape.

I simply cut three inch strips along the grain and joined them with a quarter inch seam. I wanted to make a tape rather than using a double folded edge.

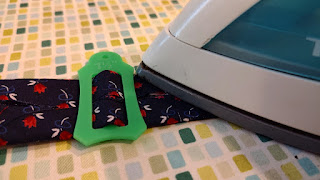
I folded the tape in half and pressed the fold. I then unfolded and used the bias tape guide I had to fold the edges into the middle. I ended up with single fold non-bias tape, a term I just made up!

Next, I unfolded the tape and pinned it wrong side up flush with the towel edge. I folded the end under at the beginning.

I stitched a little to the outside of the fold since the non-bias tape did not have the shorter edge like commercial tape. I used thread I wanted to use up even though it did not match. I stopped a quarter inch from each corner and took it off the machine to fold down the corner so they were mitered. 

After I finished attaching the tape to the towel,  I folded over the tape, pressed and stitched the opposite side as close to the edge as I could. I used matching thread so the stitching was less conspicuous. It's an old towel so you can see my stitching was not perfectly neat.

These mending techniques will help me keep these towels out of the landfill for a few more years.

Saturday, October 21, 2023

A long term project


Every once and a while I decide that rug making would be kind of cool. But it never goes as planned. I started this rug for the landing on my basement stairwell using a locker hook technique.  I thought it would take a few weeks. Two years later, my family laughs at me when I take out the project to work on it.

I am determined to finish this project some day. And I like the color scheme. So I am going to blog about it and hopefully you will join me in the journey.

To make this type of rug, you will need rug canvas, fabric to cut into strips, yarn or string and a locker hook. A locker hook looks like a needle on one end and a crochet hook on the other. I used canvas that had four squares per inch.

Locker hook and fabric strips  


To begin, I took custom measurements of the space, which has some notches. When it is finally done, it will fit perfectly. I cut it the canvas leaving four or five excess rows at the edge. I hand stitched  two pieces of canvas together because neither piece I purchased was large enough. I overlapped several rows. I also covered the outside canvas with duct tape so it didn't poke me.

Then I started cutting one inch strips of fabric. I started with my son's old holey pants, then added torn sheets, socks and t-shirts to the mix. Several articles of old clothing have ended up in this project so far. I initially cute strips about an inch wide. I found that the thicker fabrics were hard to work with and started cutting them more narrowly. I tapered the ends and cut a small slit so I could later join the strips.

Strip with slit


To start fabric to the canvas, I threaded the needle with the yarn and knotted it on the canvas. I decided the perimeter would be black.Then, I took the first strip of fabric and placed it under the canvas while keeping the hook on top of the canvas, then used the hook end to pull a loop through to the top. I left a tail so I could knot it with another piece of fabric later. To secure the loop I pulled the yarn through it. 

Pulling loop through


Securing loop


All subsequent stitches are made in the same manner. I joined the fabric strips as I reached the end of the one I was hooking. To do that I fed the second strip stop through the slit on the first, then threaded that end on the second strip through the other slit on the second strip and pulled it through.


Joining strips


This is what the finished stitches look like. Some day, I look forward to showing off the final rug.

Sunday, March 19, 2023

Adapting patterns for upcycled materials - purse edition


Crossbod bag - backCross body bag - front


I am not generally a purse person. I use them to carry my stuff, but I don't have many. I use a relatively small crossbody purse daily, and the zipper on that bag broke. The bag was a little smaller than I needed and the fabric had pilled. Instead of taking apart the purse to replace the zipper, I  decided it was time for a new purse. 


Through an online search, I identified a cross-body purse pattern that filled my needs - the Teya Crossbody from Apple Green Cottages.  I downloaded the pattern and printed it on recycled paper. Then I began searching through my stash of materials.


I had wanted to use the upholstery scrap with the blue flower (pictured above) forever and decided to coordinate that with a plain blue scrap  I had a bunch of zippers from the jumble stash. I also had a strap and hardware from a purse that was still functional, but really dirty despite washing. I also had some lightweight interfacing, quilting cotton, corduroy, and a jacket that my son had outgrown, but was not in good enough shape to be given away. 


Materials to be upcycled

Upcycling means working with what I have, not necessarily what the pattern envisioned and I had several redos and adaptations along the way. 


I had hoped to use the jacket for the pocket linings at the front and back of the purse, thinking it would add water repellency, but when I pinned the pattern pieces to the fabric and cut one of the pocket linings, I realized that I did not have enough and it wasn't sturdy enough for what I needed. I switched to the quilting cotton I was using on the pattern.


The upholstery scraps also caused me consternation. One of the first steps of the pattern was to make a tab for a recessed zippered. The directions called for the fabric to be folded over twice. I tried that with the flowered upholstery and with the plain upholstery and both fabrics were simply too thick. I ended up cutting the tab to nearly the size I wanted and using an overcast stitch and some fray check to finish the edges. 


The seam allowance on the bag was 3/8 inch and in some places, I simply went to 1/2 inch to accommodate the thickness of the layers. The bottom of the bag is not as neat and crisp as I would have liked, but I hope no one is looking at that too carefully. The pattern called for the strap ends to be sewn onto the side seam on the outside. The fabric was too thick to sew there so I moved it to the inside on the top edge.  


I made a few changes that went off without a hitch  I did not have any fusible fleece so I sewed the corduroy to the bag lining.  None of the zippers were exactly the right size. With pliers and an Xcato knife, I was able to cut down the top metal zipper. The other two zippers were an inch smaller than called for. One required no modification and the other required me to lengthen by 1/2 inch the fabric tabs on either side of it. I was able to add clips to the inside and outside of the purse. 


Tab for recessed zipperUpcycled clip


I haven't yet tackled water repellency and I am not yet sure if I will do that, but I did test rubbing some beeswax on some of the outer fabric after warming it with an iron and I may add that later (probably by melting it and brushing the wax on) 

Water beading on fabric


I am looking forward to transferring my stuff to this bag tomorrow and seeing how this works in real life. 


Tuesday, February 14, 2023

Low waste Valentine's gifts


One of the things that really bothers me about gift-giving is all the packaging. I love the aesthetics of a well put together gift basket, flower arrangement or tray, but there is so much stuff involved that just clutters up my house or goes straight into the recycling bin or trash.

This year my co-op Mississippi Market tweeted the suggestion to buy Valentine's Day treats in their bulk section. I buy grains and dried fruit in bulk, but it had not occurred to me to buy gifts.

I went to the co-op with my own containers, purchase six treat items, and layered them in large mason jars that I already had. Finished it off with some reused ribbon. One of the items was a dark chocolate turtle .  I had asked for dark chocolate turtles for Hanukkah and my spouse ordered some from a city many hundreds of miles away but apparently they were sitting at the co-op we go to weekly.

Voila - a low waste gift.

Low-waste celebration

I turned 52 a few weeks ago and I threw myself a low-waste birthday picnic at a local park. We have been hosting low-waste gatherings at hom...