Sunday, October 29, 2023

A trio of towel mends


Three mended towels
 
Over the past week, I mended three towels. Two towels still had a lot of fluff. The other was simply beloved by my spouse, even though I would have cut it up to turn it into rags. Each towel was worn or ripped in a different way so I employed different mending techniques. 

Adding a strip

The brown and white towel had a simple rip along the non terry cloth strip. I don't know if the strip has a name. I reinforced the torn area with some zig zag stitches and then cut a strip of velour from my stash, covered the strip and used a zig zag to stitch around the perimeter.

Blues Clues mend

The first blue towel has two serious tears on it. I pinned a thin scrap over the holes and then I went back and forth over the area using the darning foot to close them up. Then I cut out patches of blue velour and sewed them on each side the towel using a zig zag stitch around the perimeter. I used an over cast stitch on the edges to finish it off. The final product reminded me of Blues Clues.

Binding

The third towel had fraying edges. In the past I had stitched fraying edges with a zig zag, but the towels looked messy. I decided to bind this one. I used washed and preshrunk quilting fabric from my stash. I decided I didn't need bias binding because the towel didn't have curves, the fabric remnant selected was narrow and I didn't want to do the extra work to make bias tape.

I simply cut three inch strips along the grain and joined them with a quarter inch seam. I wanted to make a tape rather than using a double folded edge.

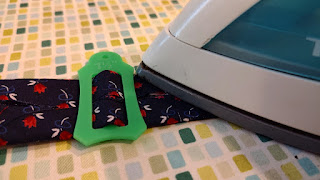
I folded the tape in half and pressed the fold. I then unfolded and used the bias tape guide I had to fold the edges into the middle. I ended up with single fold non-bias tape, a term I just made up!

Next, I unfolded the tape and pinned it wrong side up flush with the towel edge. I folded the end under at the beginning.

I stitched a little to the outside of the fold since the non-bias tape did not have the shorter edge like commercial tape. I used thread I wanted to use up even though it did not match. I stopped a quarter inch from each corner and took it off the machine to fold down the corner so they were mitered. 

After I finished attaching the tape to the towel,  I folded over the tape, pressed and stitched the opposite side as close to the edge as I could. I used matching thread so the stitching was less conspicuous. It's an old towel so you can see my stitching was not perfectly neat.

These mending techniques will help me keep these towels out of the landfill for a few more years.

Saturday, October 21, 2023

A long term project


Every once and a while I decide that rug making would be kind of cool. But it never goes as planned. I started this rug for the landing on my basement stairwell using a locker hook technique.  I thought it would take a few weeks. Two years later, my family laughs at me when I take out the project to work on it.

I am determined to finish this project some day. And I like the color scheme. So I am going to blog about it and hopefully you will join me in the journey.

To make this type of rug, you will need rug canvas, fabric to cut into strips, yarn or string and a locker hook. A locker hook looks like a needle on one end and a crochet hook on the other. I used canvas that had four squares per inch.

Locker hook and fabric strips  


To begin, I took custom measurements of the space, which has some notches. When it is finally done, it will fit perfectly. I cut it the canvas leaving four or five excess rows at the edge. I hand stitched  two pieces of canvas together because neither piece I purchased was large enough. I overlapped several rows. I also covered the outside canvas with duct tape so it didn't poke me.

Then I started cutting one inch strips of fabric. I started with my son's old holey pants, then added torn sheets, socks and t-shirts to the mix. Several articles of old clothing have ended up in this project so far. I initially cute strips about an inch wide. I found that the thicker fabrics were hard to work with and started cutting them more narrowly. I tapered the ends and cut a small slit so I could later join the strips.

Strip with slit


To start fabric to the canvas, I threaded the needle with the yarn and knotted it on the canvas. I decided the perimeter would be black.Then, I took the first strip of fabric and placed it under the canvas while keeping the hook on top of the canvas, then used the hook end to pull a loop through to the top. I left a tail so I could knot it with another piece of fabric later. To secure the loop I pulled the yarn through it. 

Pulling loop through


Securing loop


All subsequent stitches are made in the same manner. I joined the fabric strips as I reached the end of the one I was hooking. To do that I fed the second strip stop through the slit on the first, then threaded that end on the second strip through the other slit on the second strip and pulled it through.


Joining strips


This is what the finished stitches look like. Some day, I look forward to showing off the final rug.

Low-waste celebration

I turned 52 a few weeks ago and I threw myself a low-waste birthday picnic at a local park. We have been hosting low-waste gatherings at hom...