One of the more substantial projects I have completed in the past few years was a quilted tablecloth for our coffee table. Way back before we had a child, we left the table bare. But alas the child came along and quickly scratched and dented the table forcing us to cover it. Of course, we didn't have a coffee-table-sized cloth so we folded a sheet to fit the table and put binder clips around the edges in an attempt to keep it on the table. As you can see, that didn't work so well.
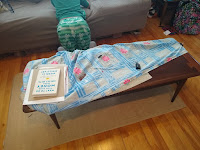
I had wanted for some time to make a quilted item with denim and had already collected old jeans from people in my local Buy Nothing group.
Planning the project
One of the main reasons to sew your own is that you can customize for your exact needs. I wanted a tablecloth that fit our table. The tablecloth needed to be thick enough to take abuse from the kid, but thin enough to balance a cup of coffee on. I also wanted the tablecloth to stay on the table, which I knew would be a challenge with my kid.
Once I determined what I needed the tablecloth to do, I determined the size and shape of the finished project. The table top measured 49 1/2 inches by 19 1/2 inches. I initially had planned slightly smaller, but the finished tablecloth ended up being 59 1/2 by 30 1/2 inches.
I wanted shaping in the corners so I considered whether I would sew corner seams or add the shaping another way. I decided to sew a flat rectangle that I would gather slightly at the corner with hand sewing.
The next step was to decide on the materials. I knew the top layer would be denim. I selected a piece of relatively unattractive upholstery fabric I had acquired as the batting or middle layer. I decided to use a duvet cover that I had purchased for $5 at a thrift shop for the bottom layer and binding.
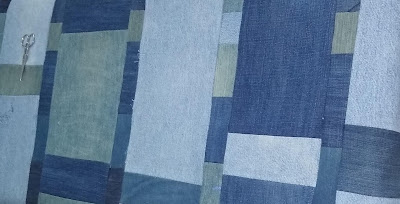
Piecing the denim
 I cut the seams and worn and torn areas from the many jeans I had collected. I decided that the length of my quilt blocks would simply be the width of the final quilt.
I created both wider and narrower blocks. For the width of the larger blocks, I laid pieces of similar size together and made blocks that varied from 6 and 8 inches, plus a 1/4 inch seam allowance on each size. I also created narrow blocks that were 2 inches plus a 1/4 inch seam allowance on each side, totaling 2 1/2 inches.
For the wider blocks, I cut the jeans to the width and then laid the pinned pieces right sides together and, using a denim needle, stitched using a 1/4-inch seam allowance. I pressed seams open as I went. The denim was easy to work with and while it took several days, the quilt top came together more quickly than I had anticipated.

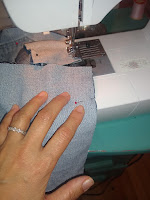
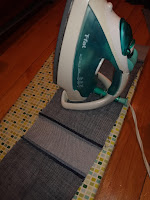
Once I had several blocks, I started stitching them together (right sides together then pressing open) with a 1/4 seam allowance). Occasionally I laid the quilt top on the table to determine if my initial size calculations were correct. In doing this, I decided to add both length and width to the quilt.
Once I finished the quilt top, I created my sandwich with the quilt top on top, the upholstery fabric in the middle and the duvet cover on the bottom. I cut the two bottom layers bigger than the quilt top because I knew that things could shift when I started stitching the layers together. I used plates from adjustable hand weights to ensure that everything was straight and taught. I pinned the layers together.
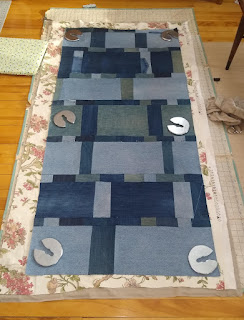 I used a quilting foot to secure the layers. I started in the center and "stitched in the ditch" between the quilt blocks. I also stitched roughly in the middle of the wider blocks as well. I also added some perpendicular seams as well. The quilting was more arduous than I had expected. The three layers together were fairly bulky and took effort to navigate through my non-professional home machine. I had to fold and secure the edges with binder clips so I could fit it through At some point I got a little sick of this part of the project and went onto one of my Facebook upcycling pages and asked if I could stop with the quilting stitches. The replies I received said because I was using fabric in my middle layer instead of quilt batting, I could get away with less stitching than if I had been using batting, I was ok with that answer.
Once the pieces were quilted together, I trimmed the edges of the bottom two layers.


A lot of fabric remained from the duvet cover, so I used that for the binding. I cut along the diagonal or bias in widths of 2 inches. I folded and pressed it into 1-inch bias tape. I pinned one side to the quilt stiched it, folded it over and secured the other side.
The coffee table had spindles in the middle so I knew I could secure the tablecloth to those. I stitched four leftover belt loops on the underside of the cloth to match the spindles' location. I threaded ribbon through it so that I could tie the cloth onto the table.


%20v3.png)
%20v3.png)
